


تركيب سقف ستارلينك الجيل الثالث: دليل شامل للتثبيت والإكسسوارات
يمكن لجيل Starlink 3 توفير إنترنت عالي السرعة للمناطق الريفية والنائية، ولكن من أجل إشارة مستقرة وأداء مقاوم للعوامل الجوية وخدمة طويلة الأمد، فإن التركيب على السطح أمر حاسم - حيث يضمن محاذاة دقيقة للهوائي مع الأقمار الصناعية بينما يحمي الهوائي من الرياح والمطر، مما قد يتسبب في تعطل المعدات.
فيما يلي، سنشارك حلول التركيب المحددة والملحقات الأساسية لأنواع الأسطح المختلفة لمساعدتك في إكمال إعدادك بسرعة.
استكشف ملحقات تركيب Starlink Gen 3 على السطح

حلول تركيب Starlink Gen 3 الشائعة على السطح
1. حامل هوائي عالمي لتركيب Starlink Gen 3 على السطح
يعتبر حامل السطح العالمي واحدًا من الخيارات الأكثر شيوعًا ومرونة لتركيب طبق Starlink Gen 3 على السطح. هذا الحامل متعدد الاستخدامات ويمكن تركيبه على أنواع مختلفة من الأسطح، بما في ذلك الأسطح المائلة والمسطحة.
الميزات الرئيسية:
- متانة عالية: محول من سبيكة الألمنيوم شديد المتانة وأنبوب فولاذي لأداء طويل الأمد في أي بيئة..
- تركيب سهل: تم تصميم هذا الحامل ليتناسب مع معظم أنواع الأسطح، مما يجعله خيارًا خاليًا من المتاعب.
- مقاوم للعوامل الجوية: يمكنه تحمل الأمطار والثلوج والرياح القوية، مما يضمن بقاء طبق Starlink آمنًا.
- التوافق: متوافق تمامًا مع أنظمة Starlink Gen 3، مما يجعله حلاً موثوقًا لمعظم المستخدمين.
الأفضل لـ:
- مالكي المنازل الذين لديهم أسطح مائلة أو مسطحة ويبحثون عن عملية تركيب مرنة وسهلة.
2. حامل السطح المقاوم للسرقة لطبق Starlink Gen 3
الأمان هو مصدر قلق كبير للعديد من المستخدمين عند تركيب ملحقات تركيب Starlink Gen 3 على السطح. يوفر حامل السطح المقاوم للسرقة حلاً لحماية طبقك من السرقة أو العبث.
الميزات الرئيسية:
- قفل مقاوم للسرقة: يتميز هذا الحامل بآلية قفل، مما يضمن بقاء طبق Starlink آمنًا ضد السرقة المحتملة.
- مواد قوية: مصنوعة من مواد قوية يمكنها تحمل القوى الخارجية ومنع العبث.
- إعداد سهل: يتضمن جميع الأجهزة اللازمة لتركيب سريع وسهل.
الأفضل لـ:
- المستخدمين في المناطق ذات معدلات السرقة العالية الذين يبحثون عن تأمين تركيب حامل السطح Starlink Gen 3.
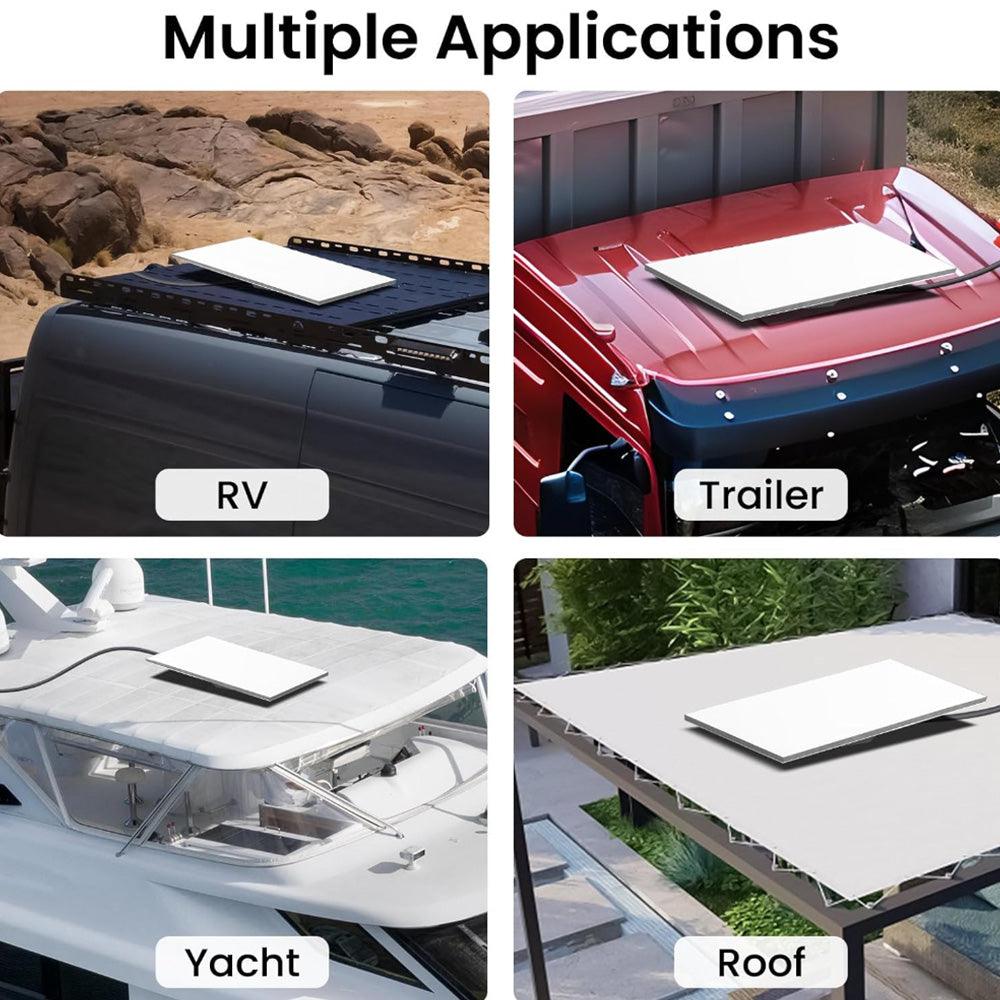
3. مجموعة تركيب السطح المغناطيسية القابلة للتعديل لStarlink Gen 3
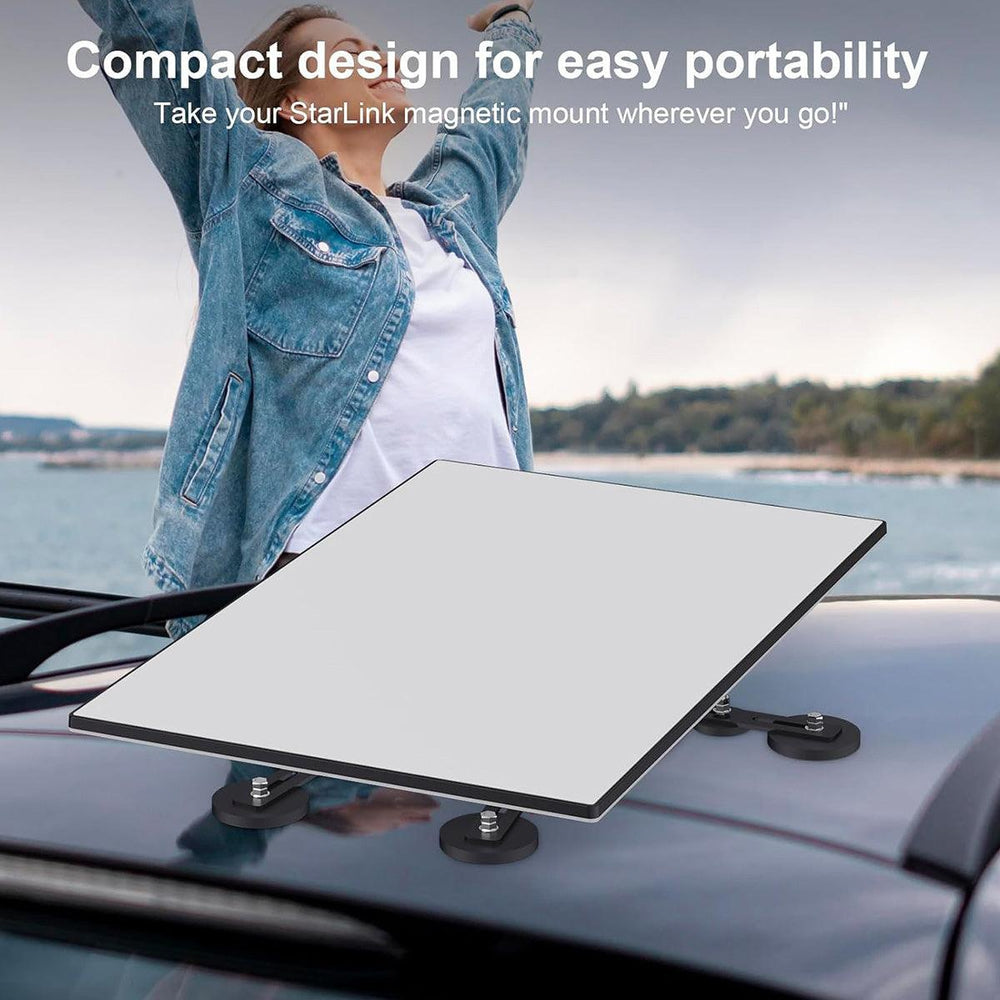
بالنسبة لأولئك الذين يحتاجون إلى حل تركيب أكثر مرونة وقابلية للنقل، فإن مجموعة تركيب السطح المغناطيسية القابلة للتعديل هي خيار ممتاز. يوفر هذا الحامل تركيبًا سهلاً دون الحاجة إلى الحفر.
الميزات الرئيسية:
- تركيب مغناطيسي: مغناطيس قوي يضمن تثبيتًا آمنًا، حتى على الأسطح المعدنية.
- قابل للنقل: مثالي للتركيبات المؤقتة أو المستخدمين الذين يحتاجون إلى نقل طبق Starlink الخاص بهم.
- مقاوم للعوامل الجوية: على الرغم من كونه قابلًا للنقل، إلا أنه مصمم لتحمل الظروف الخارجية، مما يوفر كل من الاستقرار والمتانة.
الأفضل لـ:
- المستأجرين أو أولئك الذين يحتاجون إلى حل مؤقت، بالإضافة إلى المستخدمين الذين لديهم أسطح معدنية.
اختيار أفضل حامل سطح Starlink Gen 3 لاحتياجاتك
عند اختيار حامل سطح Starlink Gen 3، من الضروري مراعاة عدة عوامل. تم تصميم ملحقات تركيب السطح لـ Starlink Gen 3 لأنواع أسطح واستخدامات محددة. إليك كيفية اتخاذ أفضل قرار:
اعتبارات نوع السطح
- الأسطح المعدنية: إذا كان لديك سطح معدني، فإن حل التركيب المغناطيسي أو القائم على المشابك هو الأمثل لأنه لن يتسبب في تلف السطح.
- الأسطح المسطحة: بالنسبة للأسطح المسطحة، قد تحتاج إلى عمود أطول أو حامل قابل للتعديل لرفع الطبق لتحسين استقبال الإشارة.
- الأسطح المائلة: إذا كان سطحك مائلًا، فإن حامل السطح العالمي الذي يمكنه التكيف مع الميل ضروري للحفاظ على مستوى الطبق.
احتياجات الأمان
- إذا كنت قلقًا بشأن السرقة أو العبث، فإن حامل السطح المقاوم للسرقة مع نظام قفل سيوفر لك راحة البال.
متطلبات التركيب
- تركيب سهل: إذا كنت من محبي الأعمال اليدوية، ابحث عن حوامل الأسطح التي يسهل تركيبها دون الحاجة إلى مساعدة محترف. خيارات مثل مجموعة تركيب السطح المغناطيسية القابلة للتعديل مثالية لأولئك الذين يفضلون الحلول بدون حفر.
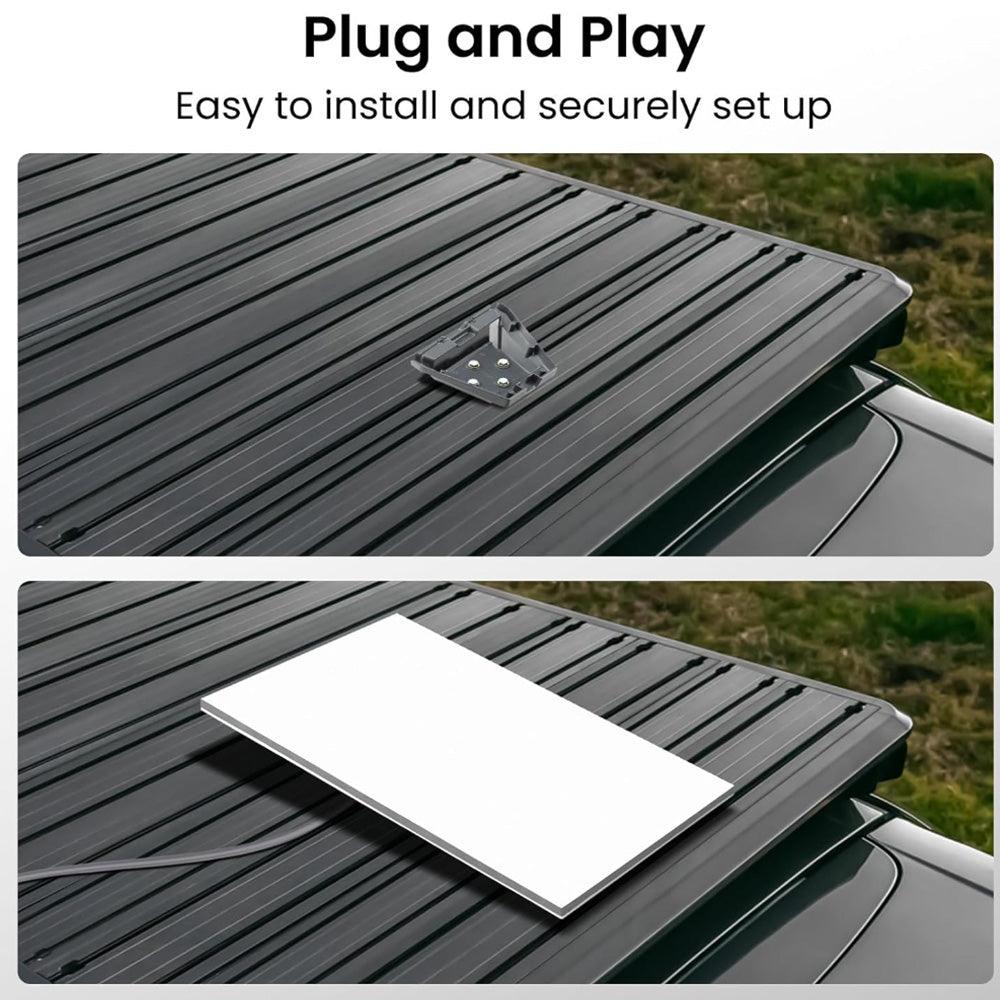
دليل التركيب: كيفية تركيب حامل سطح Starlink Gen 3 الخاص بك
بمجرد اختيارك لنظام تركيب سطح Starlink Gen 3 المناسب، اتبع هذه الخطوات لتركيب طبقك بشكل آمن:
الخطوة 1: اختر الموقع المناسب
تأكد من أن الموقع على سطحك يوفر خط رؤية واضح نحو السماء. تجنب العوائق، مثل الأشجار أو المباني العالية، التي قد تحجب إشارة القمر الصناعي.
الخطوة 2: تركيب حامل التركيب
اعتمادًا على نظام التركيب الذي اخترته، قم بتركيب حامل السطح أو نظام العمود وفقًا لتعليمات الشركة المصنعة. تأكد من أن الحامل مثبت بإحكام ومستوى لضمان استقبال إشارة مثالي.
الخطوة 3: قم بتوصيل الطبق
بمجرد أن يكون الحامل مثبتًا بشكل آمن، قم بتوصيل طبق Starlink Gen 3 بالحامل. تأكد من أنه مثبت بإحكام وموجه في الاتجاه الصحيح لالتقاط أفضل إشارة.
الخطوة 4: تحقق من قوة الإشارة
استخدم تطبيق Starlink للتحقق من قوة الإشارة بمجرد اكتمال التركيب. إذا كانت الإشارة ضعيفة، قم بتعديل الطبق قليلاً حتى يتم إنشاء الاتصال الأمثل.
استكشاف مشكلات تركيب السطح الشائعة
1. إشارة ضعيفة
- إذا كانت الإشارة ضعيفة، تأكد من عدم وجود عوائق تحجب خط رؤية الطبق نحو السماء. تحقق من الأشجار أو المباني التي قد تكون نمت منذ التركيب.
2. تحرك الطبق
- إذا لم يبق الطبق في مكانه، تحقق من إحكام تثبيت الحامل. يجب أن يمنع حامل السطح Starlink Gen 3 المثبت بشكل صحيح الطبق من التحرك بسبب الرياح أو عوامل البيئة الأخرى.
3. عدم تناسب الحامل بشكل صحيح
- إذا لم يتناسب الحامل، تحقق من أنه متوافق مع نوع السطح الخاص بك. على سبيل المثال، قد يتطلب السطح المعدني حاملًا مغناطيسيًا، بينما قد يحتاج السطح المسطح إلى نظام عمود.
اتبع نصائح التركيب وخطوات استكشاف الأخطاء لضمان تشغيل نظام Starlink Gen 3 الخاص بك بسلاسة وتوفير اتصال إنترنت سريع وموثوق لمنزلك أو عملك.