


Starlink Gen 3 Ultimate Accessories Guide: Optimized Solutions for Home, RV, and Marine Users (2025 Edition)
Starlink Gen 3 has redefined satellite internet with faster speeds, improved hardware, and enhanced reliability.
While the out-of-the-box kit allows for instant connection, achieving top-tier performance depends on using the right accessories tailored to your installation environment.
This guide helps you select the ideal Starlink Gen 3 accessories for home, RV, and marine setups, ensuring optimal compatibility, protection, and efficiency.
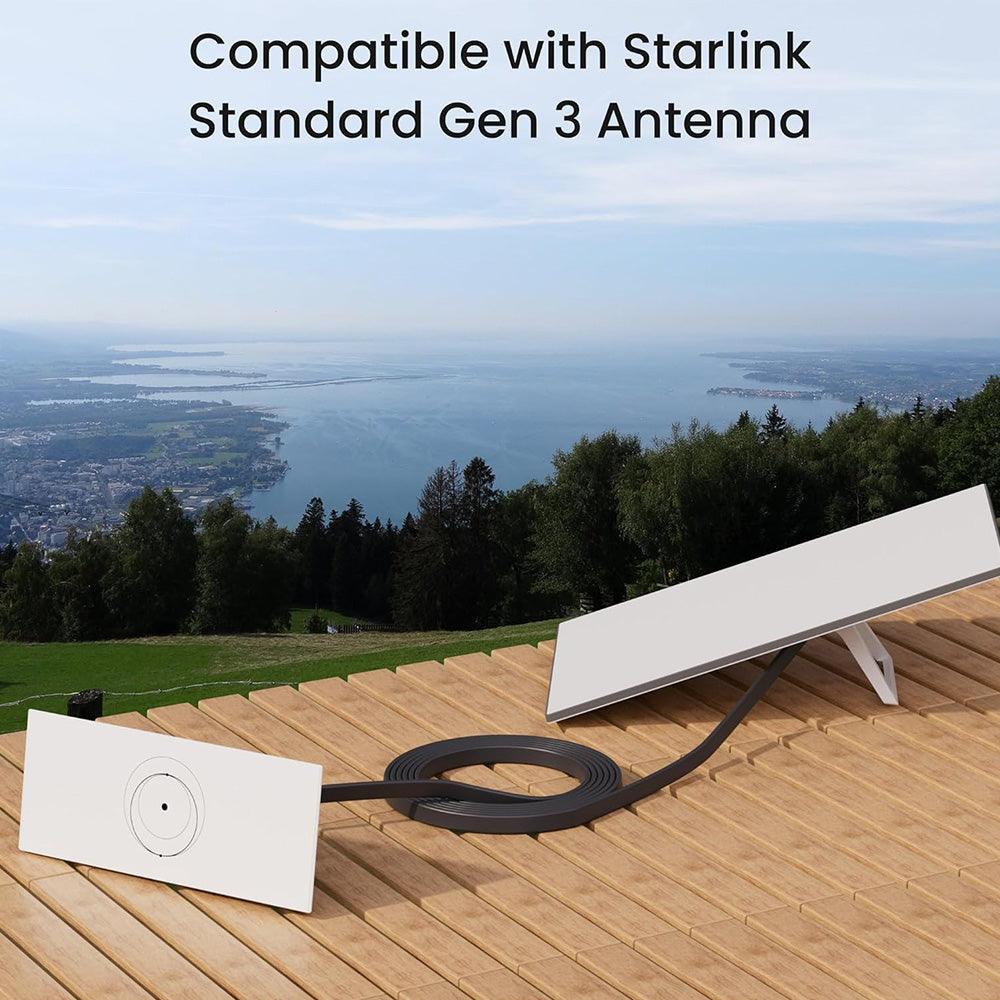
⚠️ Important Compatibility Note
Starlink Gen 3 and Gen 2 accessories are not interchangeable.
Cables, mounts, and power adapters from previous generations will not fit or function correctly with Gen 3.
Always confirm that accessories are explicitly labeled "for Starlink Gen 3."
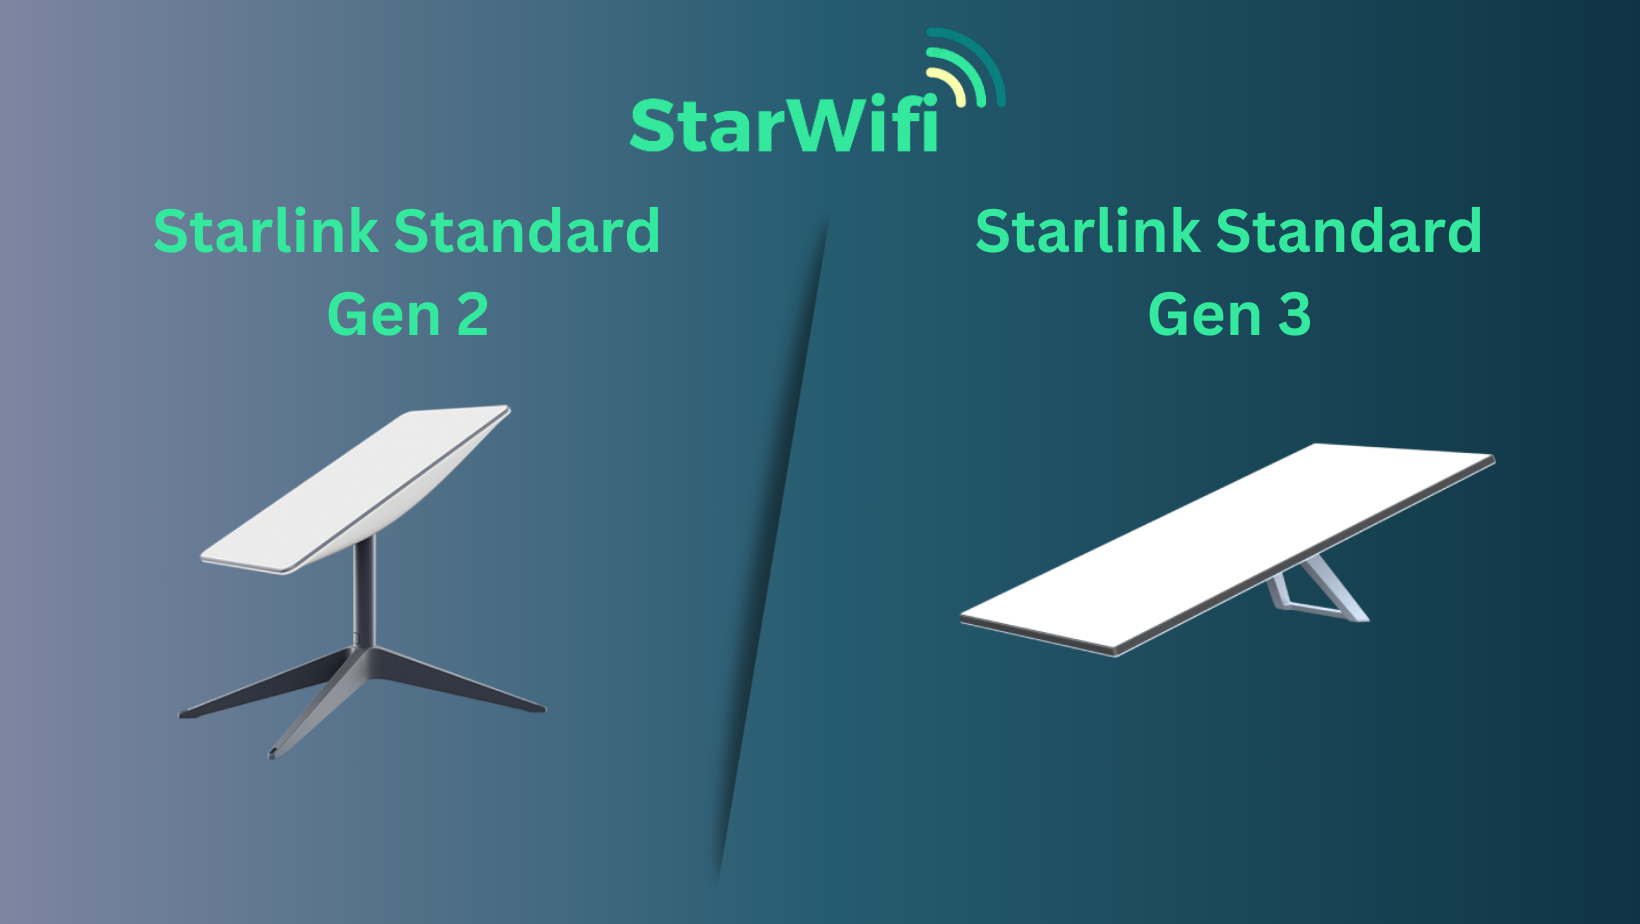
Understanding Starlink Gen 3: What's Different in 2025
Unlike Gen 2, Starlink Gen 3 features a fixed-position dish.
It no longer self-adjusts automatically; instead, you must use the Starlink App to find the best signal zone before installation.
Key Upgrades
- Faster speeds and lower latency across all coverage areas
- Flat, lightweight design for easier mounting
- Enhanced weather durability and heat management
- Built-in Ethernet port for direct wired connection
- Optimized signal capture with manual orientation
These upgrades make Gen 3 ideal for stationary, mobile, and maritime use when properly configured.
What's Included in the Box
The Starlink Gen 3 kit typically includes:
- Fixed Gen 3 Dish ("Dishy")
- Wi-Fi Router with Ethernet support
- Standard base mount for indoor or temporary setups
- AC power adapter
- Ethernet cable
- Quick start guide
Before installation, use the Starlink App's "Obstruction Finder" to ensure an unobstructed view of the sky.
Essential Accessories for Better Performance
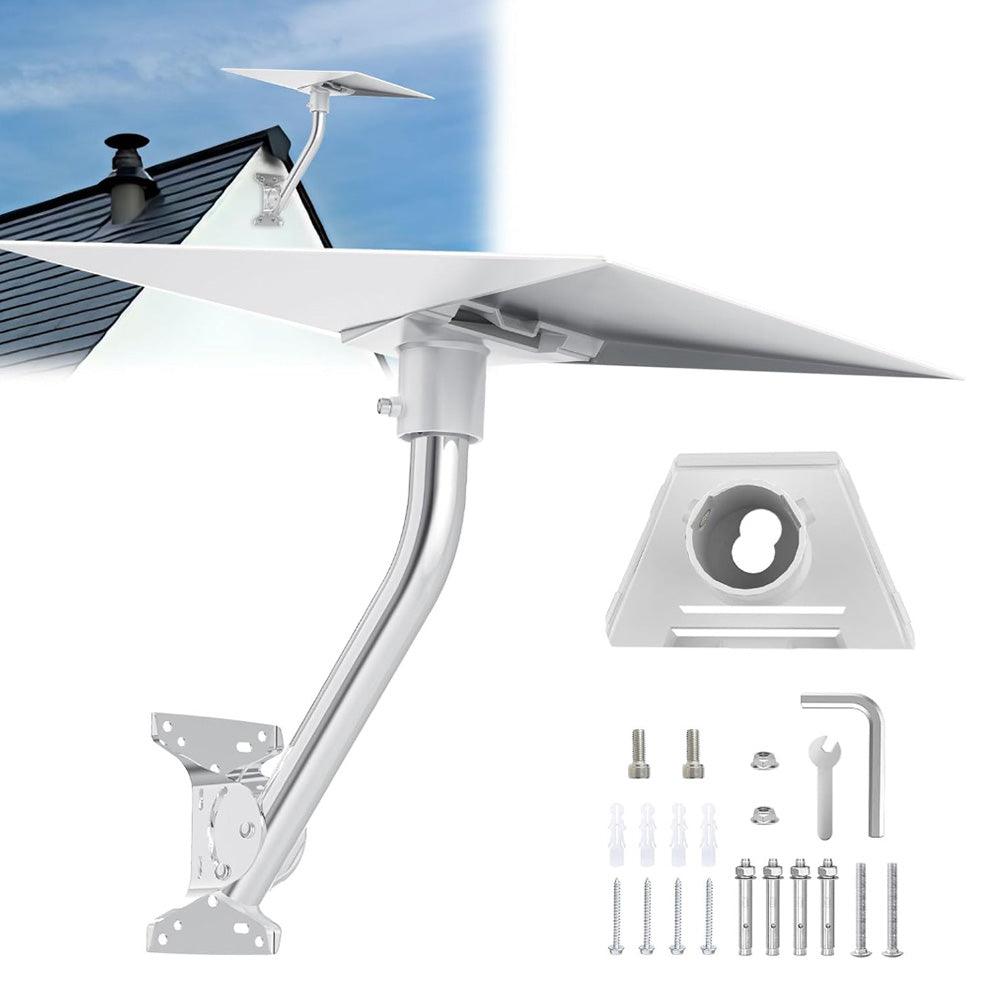
1. Mounting Options
Choosing the right mount ensures signal stability and protection against weather conditions.
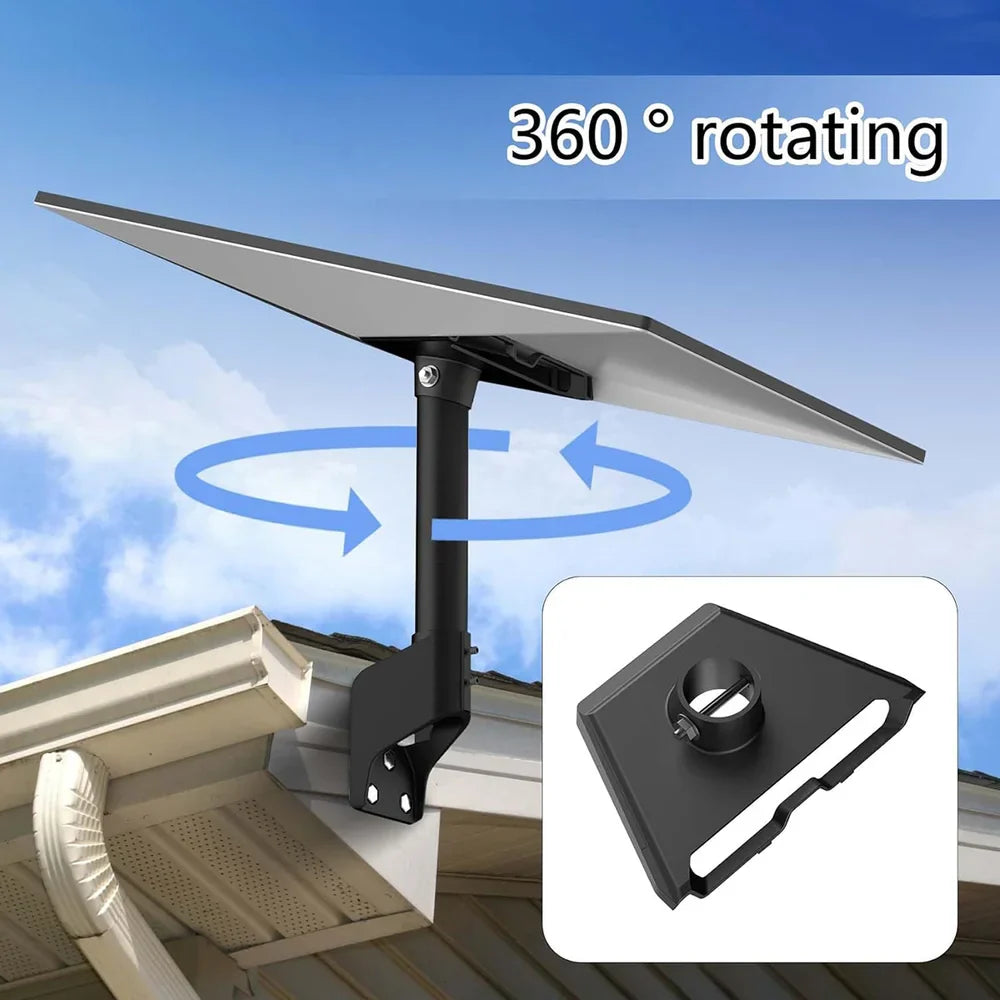
- Roof Mounts: Permanent installation for homes.
- Wall Mounts: Space-saving and sturdy for balconies or exterior walls.
- Tripod Mounts: Ideal for RVs, camping, and portable setups.
- Pole Mounts: Elevate your dish above trees or structures.
Pro Tip: Always position your dish where the app indicates the lowest obstruction score.
2. Cable & Ethernet Accessories
Keep your connections clean and stable:
- Flat Extension Cables (20–50m): Increase distance without affecting performance.
- High-Speed Ethernet Hubs: Support multiple wired devices for offices or homes.
- Wall Bushings: Protect cables entering the wall from water or insects.
Note: Gen 3 connectors differ in shape and voltage, so older cables will not fit.
3. Power & Conversion Accessories
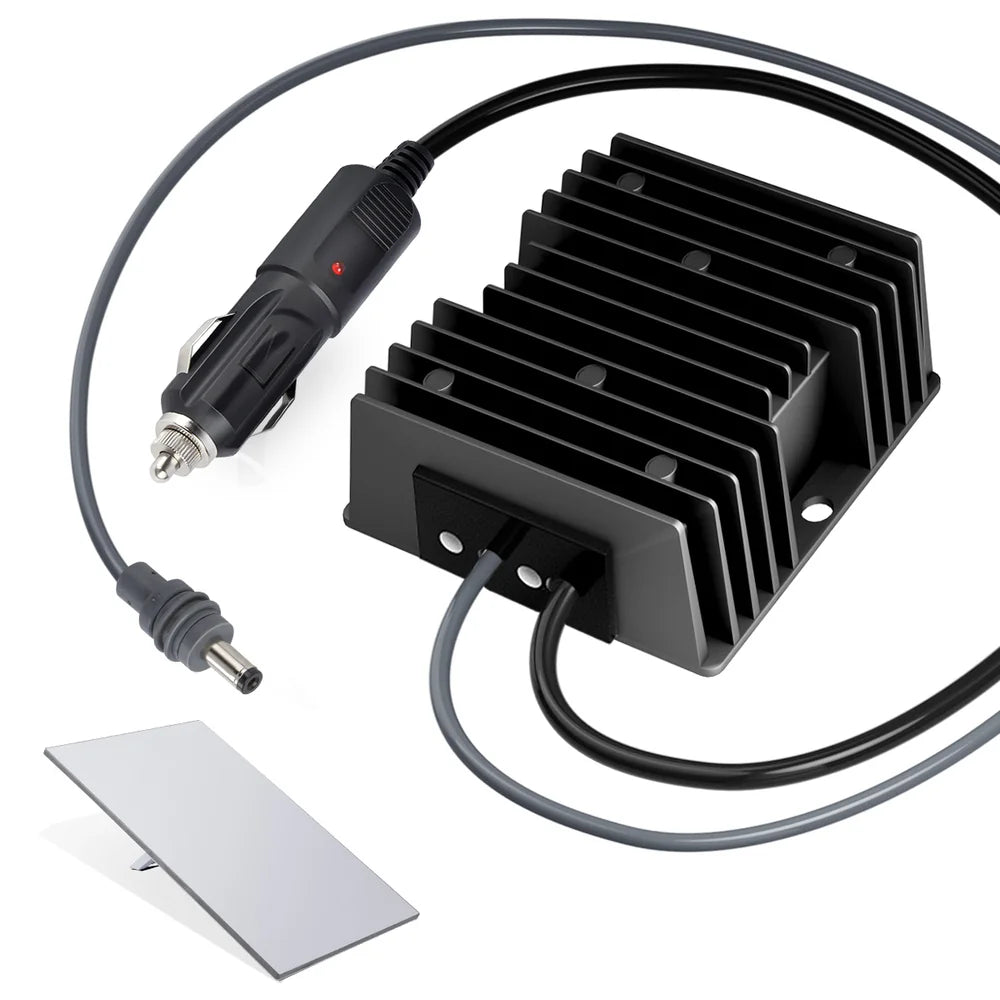
Reliable power is essential for uninterrupted connectivity.
- 12V/24V to 57V Car Converters: Power Starlink from vehicle batteries.
- 195W AC Replacement Adapters: Stable power delivery for stationary setups.
- DC Power Supplies: Recommended for solar and off-grid installations.
4. Protective Carry Case
A Starlink Gen 3 Protective Case keeps your dish, router, and cables safe during travel.
It shields against shock, dust, and moisture — crucial for RV, vanlife, or marine users.
Read more in our dedicated Starlink Case Guide.
🏠 Home Setup: Permanent & Secure Installation
For fixed installations, stability and weatherproofing are priorities.
Steps:
- Choose a roof or wall mount with anti-rust coating.
- Route cables cleanly using wall bushings.
- Connect the router directly via Ethernet for better performance.
- Seal all outdoor connectors to prevent moisture intrusion.
Recommended Accessories: Adjustable Roof Mount, Wall Bushing Kit, 4-Port Ethernet Hub.
🚐 RV Setup: Reliable Internet on the Move
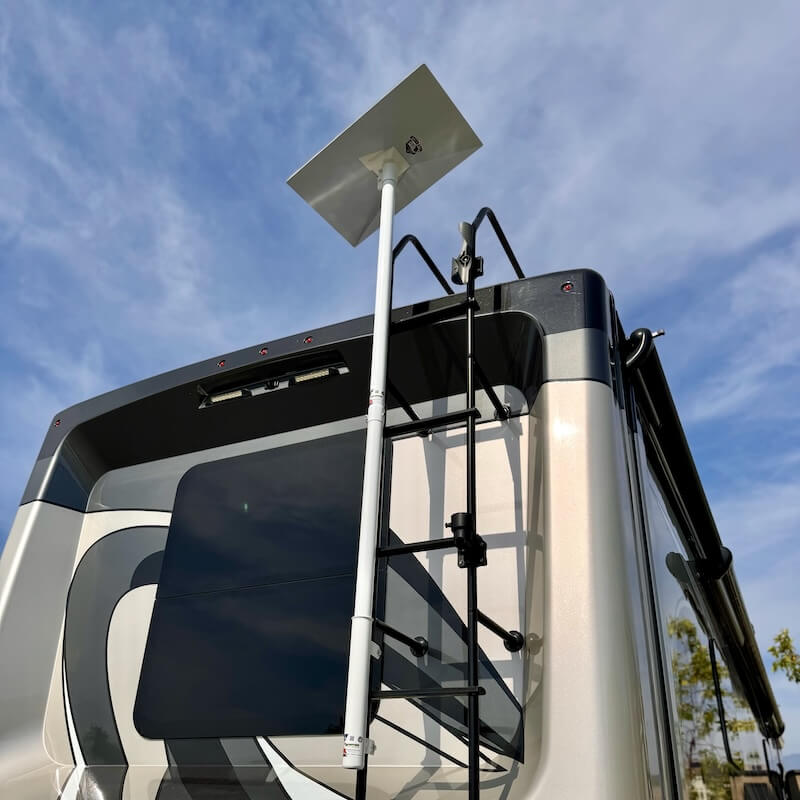
Starlink Gen 3 is ideal for RV travelers needing high-speed internet anywhere.
Steps:
- Use a foldable tripod or portable adjustable mount.
- Power via a 12V/24V car adapter or inverter.
- Store your system in a protective carry case when not in use.
- Check signal strength using the app before anchoring.
Recommended Accessories: 12V Car Power Converter, Portable Mount, Protective Case.
⛵ Marine Setup: Connectivity at Sea

For boats and yachts, corrosion resistance and cable sealing are key.
Steps:
- Mount with a stainless-steel deck or pole system.
- Keep the power adapter above deck in a dry compartment.
- Use marine-grade waterproof connectors.
- Rinse hardware periodically to remove salt deposits.
Recommended Accessories: Stainless Steel Deck Mount, Waterproof Cable Kit, 150W Power Adapter.
🛠️ Installation & Maintenance Guide
Setup Overview
- Use the Starlink App to find the optimal direction.
- Assemble the mount and secure the dish in place.
- Connect the power and Ethernet cables.
- Turn on the system and verify alignment in the app.
Maintenance Tips
- Clean your dishes regularly to prevent dust or snow accumulation.
- Inspect cables for wear or exposure.
- Reboot your router after updates or if speed drops.
Troubleshooting Common Issues
| Issue | Cause | Solution |
|---|---|---|
| No signal | Blocked line of sight | Reposition using the Starlink App |
| No power | Faulty adapter or cable | Test or replace power supply |
| Low speed | Network congestion | Reboot, update firmware, or change orientation |
🛒 Recommended Accessories (Available in Store)
| Product | Purpose |
|---|---|
| Adjustable Roof Mount | Permanent home setup |
| Wall Bushing Kit | Neat indoor cable routing |
| 12V Car Converter | Reliable RV power supply |
| High-Speed Ethernet Hub | Multi-device connectivity |
| Stainless Deck Mount | Marine-grade installation |
| Protective Carry Case | Safe storage and transport |
Conclusion
Starlink Gen 3 represents a significant leap in satellite internet technology — but proper installation and accessories make all the difference.
Whether you're setting up at home, traveling cross-country, or exploring at sea, the right combination of mounts, cables, and power options will keep your signal strong and reliable.
Discover our comprehensive range of Starlink Gen 3 accessories to create your ideal setup today.